First time installing your Roll Up Retractable Banner Stand?
Our Roll Up Retractable Banner Stands can be set up in seconds.
Watch our installation video and start showing off your business!
It is imperative that these steps be followed closely, as the chance of a failure in either hardware or flag increases with misuse. To avoid this and save time, cost, and stress here some steps that you can follow to ensure that your Advertisement Flags are properly installed:
Remove the contents out of the Nylon Bag. The items should include the flag fabric, the flagpole (consisting of four smaller parts), a locking pin, a clip with key ring and bungee cord, and the base attachment (cross base or ground spike).
Assemble the flagpole, by putting together the 4 parts. The pieces will all connect in order of size, with the largest piece being on the bottom and the smallest one on top. The first parts of the pole will be aluminum. The proceeding two will be fiberglass. The pieces should hold together ultimately by the tension of installation.
Once you’ve connected all the parts to make a single pole, pass the pole through the black fabric pocket spine of the flag. Make sure that the pole slides all the way along the pocket until the tip of the pole reaches the end of the pocket. This will guarantee that the flag is nice and taut and will provide just enough tension to slightly curve the flagpole.
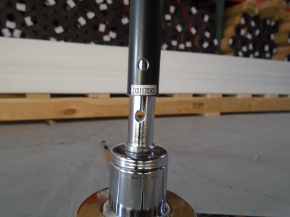
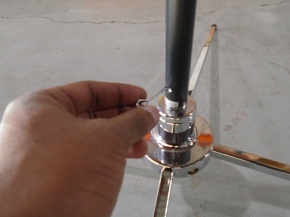
Place the bottom of the flagpole into the base attachment (cross base or ground spike). You will notice that there is a hole that runs through both the flagpole and base attachment. This will allow the locking pin to pass through, and keep the pole secured onto the base attachment.
(Be sure to fold the pin around the flagpole to ensure that the pole is securely attached)
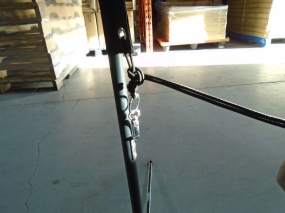
Now that the flag is standing upright, the final step is to use the bungee cord to tie the flag fabric to the pole. The bottom-most piece of the pole will have a small silver metal plate with a hole. The clip/carabiner is meant to attach to the silver plate. Once the clip is attached on, you will pass the bungee cord through the key ring as well as the grommet at the beginning of the black fabric pocket spine of the flag. You will then tie the cord such that the flag is pulled taut over the pole.
Congratulations! You have now successfully installed an advertisement flag, and are ready for your brand and logo to be put on display for the world to see. I would just like to note for your reference, that the base attachment spins, and as such the flag should be able to rotate at the base attachment when blowing in the wind. If the flag is not spinning then you have not installed the flag correctly. If you follow the above instructions you won’t have any trouble. Thank you for choosing Signworld Canada! We wish you the very best of luck in your future advertisement campaigns.
Banner stands can often lose tension due to dropping of the banner causing the print to snap back into the mechanism. The mechanism will free spin and your banner becomes non-retractable. Only perform this if you are comfortable with repairing the hardware. If done incorrectly there is a risk of hurting yourself and damaging the hardware, this voids your warranty. If at any time you are unsure, please contact us through e-mail, chat or phone call, we'll be more than happy to assist you.
Trade Show Guide
Flowing and OpenBe sure to keep an open space in your booth. The key to gaining your audience’s trust and willingness to listen to you for even a second is their comfort level. That one crucial second is all you essentially need to deliver your message. Always keep your front to the customers and never turn on back towards them, maintain a high level of approachability to secure a high rate of audience inquiry. Make sure your audience is comfortable in entering your space and comfortable enough to stay.
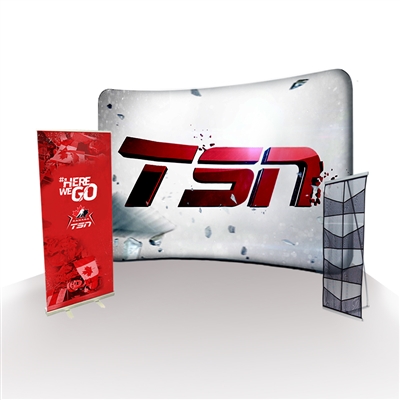
ProfessionalA lot of times, we see booths that look like they were assembled from pieces that just don’t go together. Professionalism is crucial to your company’s first impression and its lasting memory in your potential customer’s minds. This is why cheaping out on your displays and hardware is definitely not something you’d want to do. Having the right selection of hardware such as these (link to trade show package) to create a consistent well-themed company image is key to any trade show success.
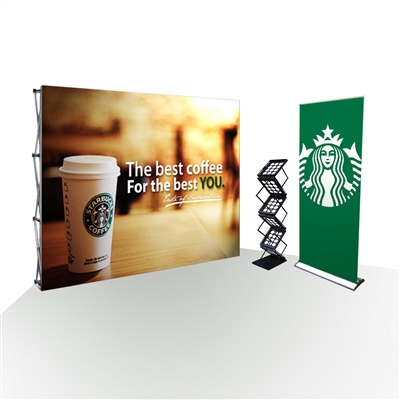
SignageThe perfect sign would be one that catches the attention of the audience, explains to them what your company does, and then makes them WANT to learn more. Make sure your sign is vibrant enough in terms of colour and design but not too much to complicate your message.
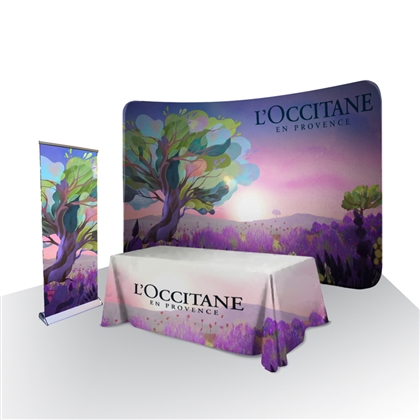
Stunning GraphicsTrade Shows are all about visuals, it’s why you are there. Having stunning graphics is very important in attracting potential customers to your booth. Stunning graphics can stop people, and you only need to stop them for a couple seconds so that you and your staff can make your moves.
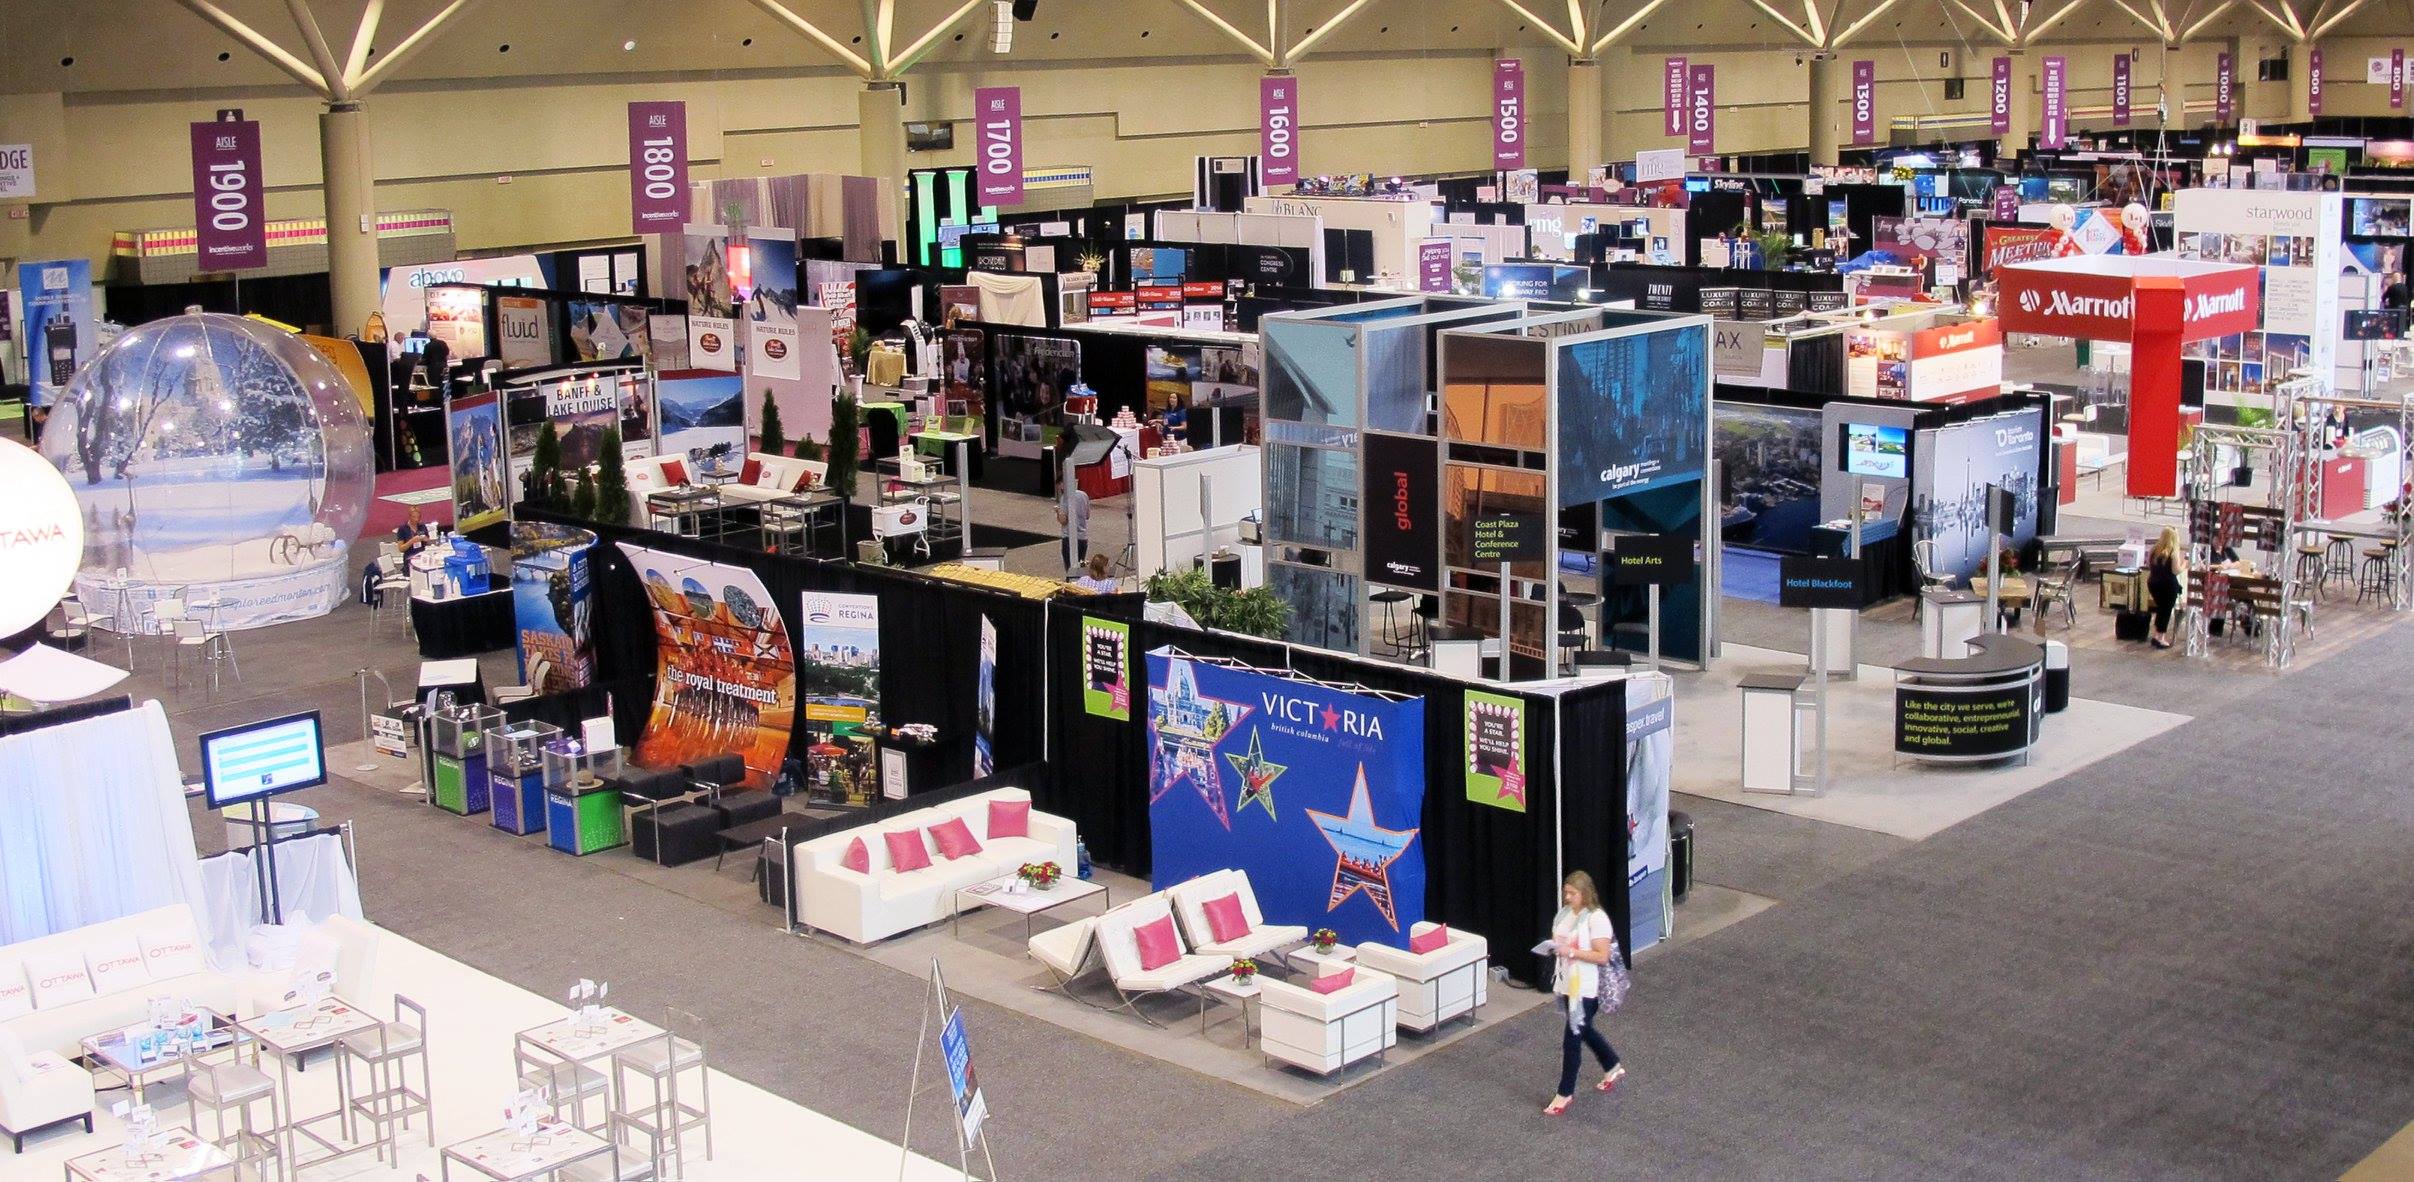
Location, Location, LOCATIONThe location of your booth during the show is vital to the number of people you can attract. Here are some unanimously agreed locations that are said to drive up traffic for booth vendors:ENTRANCE The entrance is the one place in the entire show where everyone has to go through. Having your booth at the entrance guarantees it to be seen by 100% of the visitors. The benefits of this would be that your company is automatically granted the first step into the minds of every single person present.... but wait, we’re not done yet. Just because the audience is forced to see your company doesn’t mean they automatically translate to leads. Having attractive displays and hardware to draw your audience to your booth is still in your responsibility and that is still a job to be done. Hardware such as these and attractive graphics will be what you need to get this job done!
Close to the Washroom
Another location that would guarantee high volume of traffic would be right by the washrooms. This is a biological need that every single person has. It may sound comical but placing your booth near the washroom would have a huge effect on the number of people that notice your booth and company. Just be sure to take advantage of the traffic that you’re gaining and not standing around waiting for people to come. The first contact MUST ALWAYS be made by your staff.
Right Hand Rule
This following tip is concluded from simple observation. It is said that people, whether left or right-handed, always tend to look to the right side first when in “shopping mode”. It is for this reason that people say most of the action during a trade show takes place on the right side of the entire exhibition space. Take advantage of this tip and try your best to land a spot on the right side of the main entrance at your next trade show.
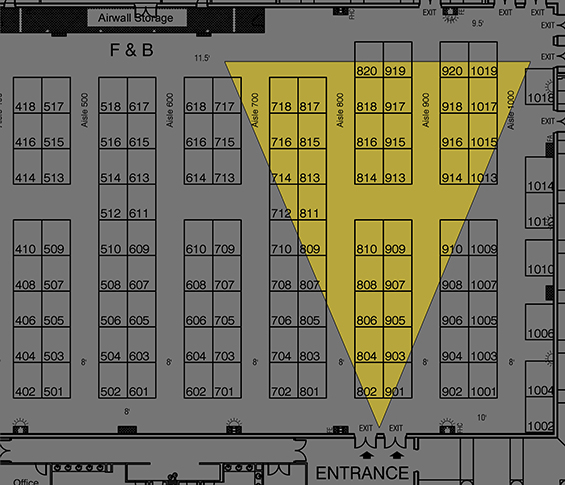
Triangle Line of Sight
The last interesting theory is said to have scientific research backing it up, so keep this one in mind. We call it the “Triangle Line of Sight”. The idea behind this is that the line of vision for humans is as seen in the picture. People tend to scan and travel in the shape of the light part of the image. Anywhere in the light is considered a good spot, and nothing much really happens in the dark spots. So next time you choose a booth location, take this theory into consideration.
Have you been eying one of our professional Retractable Banner Stands, or maybe even the sleek Trade Show Counter, but you’re feeling a little overhelmed by the prcoess of creating print-ready graphics?
In this blog post, we’ll put your worries to rest by explaining exactly how you can create professional looking graphics to meet our specifications. Save time and avoid headaches by going DIY!
For the purposes of this tutorial we’re going to be using GIMP, a free image editor available for download here: GIMP
Once the program is installed, open it up and we can begin to create the banner artwork. Click on File>New .
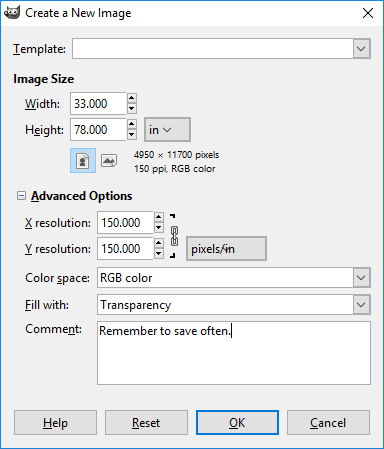
A dialogue box will appear that looks like so:
We need a few more options than what is provided by default so click the + Advanced Options icon, and fill in these boxes.
Since we’ve ordered a PDE03P we’re going to need to make this file 33” wide by 78” tall. Make sure to set the resolution of the x and y axis to 150 dpi. You can use this opportunity to select the background colour for your banner, or leave it transparent if you wish to play with some imagery later on.Click ok, and you may see this prompt come up
It’s fine to click “OK” unless your computer has a hard time dealing with this large of a file.
If you’re finding your choice of background colour was off, or you would like to add one, you can do so by going over to your tools palette and selecting the paint bucket tool. Pick the colour you wish to use, and click over your background layer.
This image processor uses a concept known as layers to accomplish creating your designs. You can create a new layer to put artwork on, and if you don’t like what’s going on with your image, you can toggle the layers on/off or delete them entirely.To create a new layer, you can go to your layer palette and select create a new layer
You’ll be prompted to give the layer a size (it will be the size of your document by default, don’t change if not necessary)
Do you have an existing logo or graphic you need included in your banner? Locate the file on your system and drag into GIMP your .ai/.eps/.pdf graphics. Set the resolution of the graphic to 150dpi.
If you need to use the scale tool, remember to click the small chain to keep the original proportions of the graphic intact.
Have some text you wish to put on your banners? In the tool palette, there will be a text tool. Click this, and drag out a box to fill with your desired text. A small dialogue box should have opened up to give you the chance to change your font and text size.
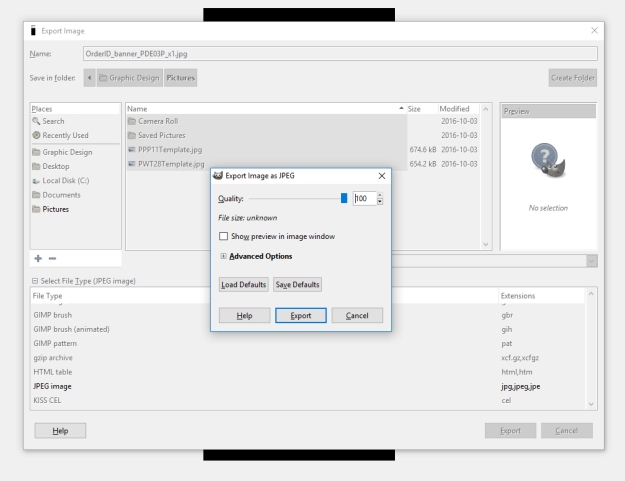
If you’ve completed your design, you can save your design using File > Export Image.
Be sure to select .jpg or .jpeg and rename your banner artwork with your order ID (You will have received this after checkout was completed) (IMAGE 11)
Ensure your jpeg is being saved as the maximum quality it can be (100) and click “Export
Now you’ll be ready to upload your artwork for your brand new banner here
This Fabric Fire Certificate is only valid for our Canopy Tent (UV full color and Logo) and Illuminated Displays. For all other fabric please contact us for futher information.


 It’s fine to click “OK” unless your computer has a hard time dealing with this large of a file.
If you’re finding your choice of background colour was off, or you would like to add one, you can do so by going over to your tools palette and selecting the paint bucket tool. Pick the colour you wish to use, and click over your background layer.
It’s fine to click “OK” unless your computer has a hard time dealing with this large of a file.
If you’re finding your choice of background colour was off, or you would like to add one, you can do so by going over to your tools palette and selecting the paint bucket tool. Pick the colour you wish to use, and click over your background layer.
 This image processor uses a concept known as layers to accomplish creating your designs. You can create a new layer to put artwork on, and if you don’t like what’s going on with your image, you can toggle the layers on/off or delete them entirely.To create a new layer, you can go to your layer palette and select create a new layer
 You’ll be prompted to give the layer a size (it will be the size of your document by default, don’t change if not necessary)
 Do you have an existing logo or graphic you need included in your banner? Locate the file on your system and drag into GIMP your .ai/.eps/.pdf graphics. Set the resolution of the graphic to 150dpi.
 If you need to use the scale tool, remember to click the small chain to keep the original proportions of the graphic intact.

 Have some text you wish to put on your banners? In the tool palette, there will be a text tool. Click this, and drag out a box to fill with your desired text. A small dialogue box should have opened up to give you the chance to change your font and text size.
 Ensure your jpeg is being saved as the maximum quality it can be (100) and click “Export
 Now you’ll be ready to upload your artwork for your brand new banner